I was a fan of GNS3. Lately, I found EVE-NG is more capable for large and dynamic labs. I will share how to set up EVE-NG on a ESXi server and how to set up a Check Point lab on EVE-NG. Nothing is new, just hope this could save you some time.
Hardware, Software, and Topology
Hardware:
• Server: IBM x3690 X5 with 12-core Xeon E7 CPU, 144GB RAM, 2TB HDD
• Laptop: Dell Latitude
• Router: Asus Wireless router with 4 Gigabit ports
Software:
• ESXi 6.7
• EVE-NG Community edition 2.0.3-110 (https://www.EVE-ng.net/index.php/download/)
• EVE-NG Windows Integration Pack ( - includes: Wireshark, UltraVNC, Putty, Plink, etc.)
• SuperPutty
• Cisco IOU i86bi-linux-l2-adventerprisek9-15.2d.bin (http://gns3.xyz/files/Downloads/Cisco-IOU-L2-L3-Collection-v4/bin/)
• Checkpoint R80.40 ISO
• Windows 2016 ISO
• CentOS ISO
Topology:
Start your configuration
First, set up your laptop:
1. Install EVE-NG Client Pack on your laptop
After installation, go to C:/Program Files/EVE-NG, rename “putty.exe” to “putty123.exe”
2. Install SuperPutty (64-bit) on your laptop
After installation, copy the content of C:/Program Files(x86) /SuperPuTTY to C:/Program Files/EVE-NG, and rename “SuperPutty.exe” to “putty.exe”. This will make Superputty your default SSH client so that you can open multiple tabs in one SSH window.
3. Install WinSCP on our laptop
Second, set up ESXi on your VM Host
This is straightforward and I used all the default settings. If you have any questions, please check out this video: https://youtu.be/WZQ6lVSkq4w
After the ESXi is installed, assign static IP for the host. In my case, I used 192.168.1.249, mask 255.255.255.0, gateway 192.168.1.1, DNS 192.168.1.1
Third, install EVE-NG on VM host
• Deploy a virtual machine (EVE-NG-Demo) using ovf. Detailed procedures can be found in this video: https://youtu.be/UYGoFyVqpYU
• I used following settings:
- IP 192.168.1.200, mask 255.255.255.0, gateway 192.198.1.1; domain name: example.com; DNS: 192.168.1.1, 8.8.8.8; NTP:192.168.1.1; Proxy Server Configuration: direct connection;
- The default hard drive for the virtual machine is 50 GB. You will need to add additional drive space (e.g. 200G) by shutting down the virtual machine and add another virtual hard drive.
Fourth, add nodes to the EVE-NG VM
Eve-NG is very sensitive to upper/lower case in file or folder name. If the How-to's uses all lower case or has a hyphen in file or folder name, please follow it exactly.
Install Cisco IOL Image
o https://www.eve-ng.net/index.php/documentation/howtos/howto-add-cisco-iol-ios-on-linux/
and here is another reference link: https://youtu.be/OiPY3N1Tehk
o There might be a bug in the image and you will need to add “no ip cef” in the layer 3 switch configuration later.
Install Windows Image
https://www.eve-ng.net/index.php/documentation/howtos/howto-create-own-windows-server-on-the-eve/
EVE-NG is very sensitive to syntax and you need to have a hyphen in the folder name.
Install Linux Image
o https://www.eve-ng.net/index.php/documentation/howtos/howto-create-own-linux-host-image/
o I had bad luck with the ready to use Linux image and used a fresh CentOS iso.
Install CheckPoint Image:
• Here are two links on how to set up CheckPoint image. Same procedure for R80.40 as previous version.
o https://www.eve-ng.net/index.php/documentation/howtos/howto-add-checkpoint/
o https://community.checkpoint.com/t5/General-Topics/Deploying-Check-Point-Solution-R80-40/td-p/94267
We are almost ready to set up the lab. Let’s double check the ESXi host’s virtual switch setting:
Just a reminder, 192.168.1.249 is the ESXi Host IP. EVE-NG virtual machine’s IP is 192.168.1.200.
Finally, setting up the lab
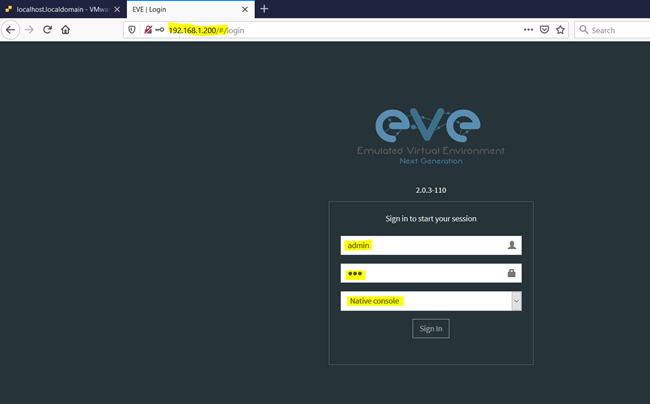
• On your laptop, from either Chrome or Firefox, go to https://192.168.1.200. The default username and password: admin & eve
• Add a new lab:

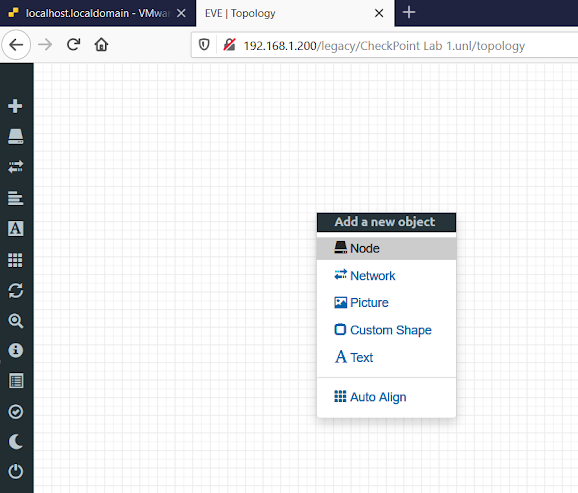
• Right click on the lab screen to bring up “Add a new object” menu and select Node:
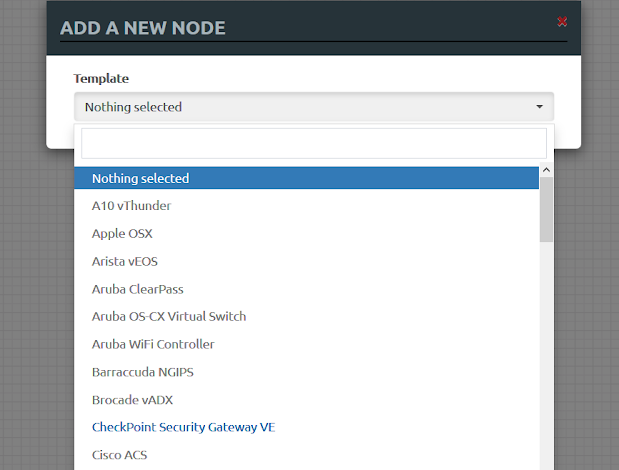
• Checkpoint Security Gateway VE, Cisco IOL, Linux Host, and Windows host should be highlighted. Those are the images you have added in the previous setup. Select Checkpoint Security Gateway VE
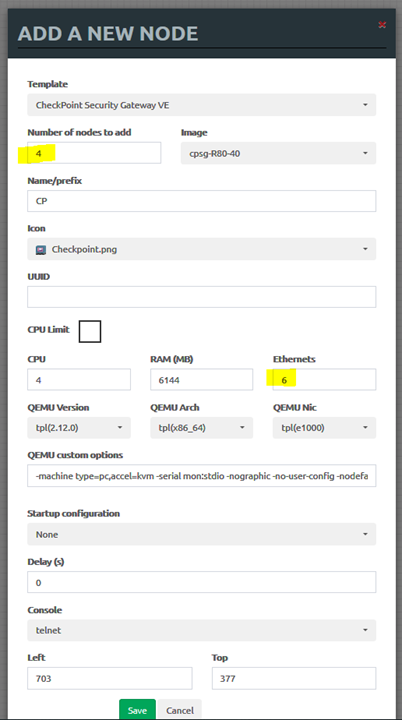
• Create 4 Checkpoint nodes with 6 interfaces. One will be a management server, two will be the main site firewall gateway cluster, and the last one will be the branch office gateway.
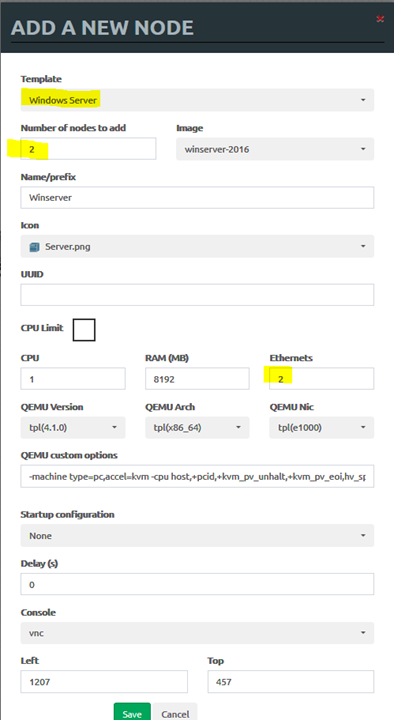
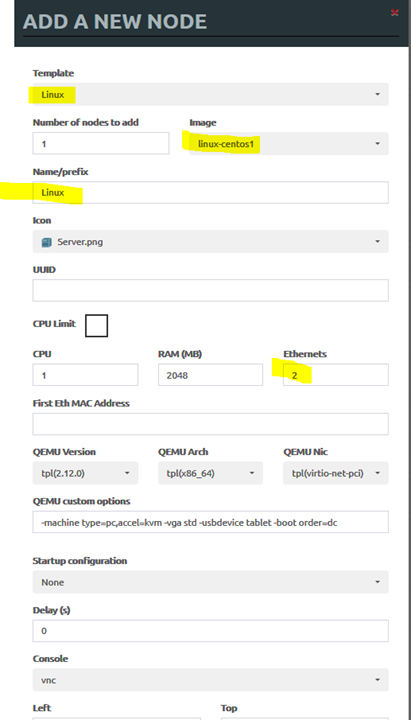
• Repeat the same process to create two Windows servers with 2 interfaces and one Linux server with two interfaces:
• Add 4 Cisco IOL switches with 3 port groups:

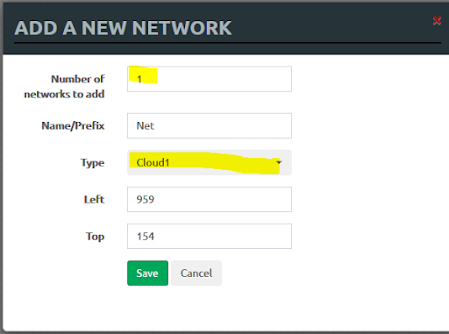
• Finally, add a network object. This will be the access to the internet for all your lab nodes.
• You can right click on the node and modify the node name, Console access method, etc. See example below:
Here is a final topology for the lab.
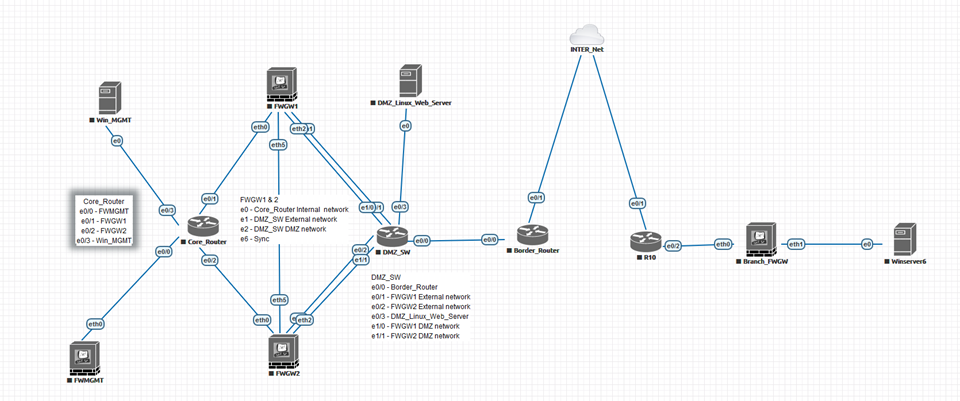
What I have not included in the above topology is that from all the nodes, you can have a link to the INTER_Net node. This dual-homed connection is to allow all the nodes to directly connect to your WIFI router/Internet temporarily to download patches or applications. For example, the Linux web server will need the httpd package. Here is a KB (https://www.digitalocean.com/community/tutorials/how-to-install-the-apache-web-server-on-centos-7) on how to set up a website on the Linux server.
By default, Check Point has 15-days evaluation license. To extend that, you will need to get eval licenses from Check Point for each node you are running:
https://supportcenter.checkpoint.com/supportcenter/portal?eventSubmit_doGoviewsolutiondetails=&solutionid=sk102029
After you generated license file for each note, you can download them to your local machine. Then copy them to Win_MGMT server in your lab.
To apply the lab, you will need to copy the license files to each CP node. I used WinSCP on the Win_MGMT machine. I ran into an issue when I tried WinSCP and got a message saying the packet size is too large. To resolve that, please follow this link and change default shall for "admin" account:
https://supportcenter.checkpoint.com/supportcenter/portal?eventSubmit_doGoviewsolutiondetails=&solutionid=sk42178
After you WinSCP to the MGMT and GWs, transfer the "CPLicenseFile.lic" you got from Check Point to the default location and run following command on MGMT or GWs:
cplic put -l CPLicenseFile.lic


 s
s


